Translate

Showing posts with label Embroidery. Show all posts

Wednesday, February 27, 2013

All About Faggotting - Part I

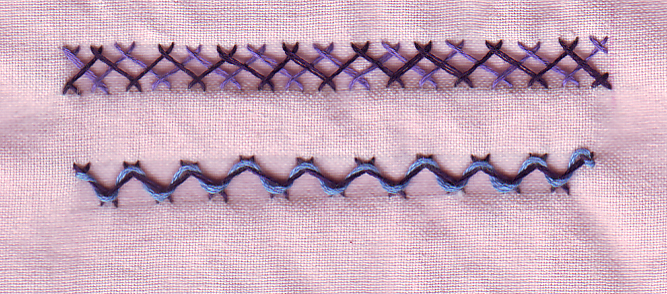
Faggotting? Never heard of the term before? It's an embroidery technique  introduced sometime around 1920 to help seamstresses keep pace with the vagaries of Dame Fashion particularly the hem length.

Okay. Faggotting is a decorative technique used to attach an extra stretch of fabric to the hem of a skirt or sleeve. The purpose is either to add length to a garment or to attach two contrasting coloured fabric. It is sometimes both. Whatever the case, the result is very attractive and give the garment a delicate touch.

Here's an example of this technique.
If you Google 'faggotting images', you'll get a fairly good idea of the practical applications of faggotting.

There are about 5 faggotting techniques that I know of, including this one. I'll post tutorials of them soon.

Sunday, August 21, 2011

70's Jacobean Style Embroidery Design

This type of design was in vogue during the late 60's and early 70's.  Seems to be back in fashion.


Types of embroidery you can use it with:
This design will work well with Jacobean embroidery

Before you begin:
Do take out the time to redraw the design. I have simply traced out the design not giving importance to perfection and symmetry. I was  in my trace out as many designs as possible in a day phase when I traced this 22 yrs ago.

In the second diagram, I have drawn a line in the center of the main design.  Use this line to align your design.  First draw the left hand side of the design.  Then fold it along the line after darkening the lines of the design. Now, trace the right hand side of the design from the wrong side of the paper.  You now have a perfectly symmetrical design.
:

Uses:
1. Saree border by altering/enlarging the design to suit a saree palu/border.
2. Corner design for cushion cover.
3. The second, will make a lovely design for a table runner worked up in satins and herring bones.

Click on the design to enlarge and take a print out.

You can use a grid to enlarge the design further to suit your requirements.


Monday, January 31, 2011

Free Designs for Embroidery from The Antique Pattern Library

These lovely designs are from the book The Drew Portfolio in the Antique Pattern Library
For fabric painting, epoxy painting, stump work
Spanish Black work
IDEAL FOR LAID WORK
For Applique and Embellishment with Beads etc.


The entire book -  about 18 pages is filled with such designs.
There are no stitch descriptions - all the better. It would be interesting to see how different people interpret these designs. 
Anyone out there ready for the challenge?
Here's what you should do.
  1. Choose any one of the 4 designs above - you may choose more than 1 design if you have the time for it.
  2. While the basic design should be retained,  slight variations are allowed.
  3. Use it to design an accessory - say cushion cover, a runner, a bag, a purse...
  4. You can use anything for embellishing the embroidery - ribbons, beads, buttons, shells...
  5. You have a month - the challenge ends on 3rd March.
  6. You can blog the steps involved and the decision making process if you wish.
The challenge will be open even if there is going to be only 1 participant.
If you want to take it up, leave a comment .

This is not a competition - as I've already mentioned, it would be interesting to see all the variations diffferent people come up with.

Update: The link to the book is broken.  I'll update it when I rediscover it.

Sunday, January 30, 2011

DMC Motifs For Embroidery Vth Series

DMC Motifs for Embroidery Vth Series is a book you'll find on 'Free Domain' - meaning - you can download it for free.
This post is a brief review of this lovely book.
Before I procede, please understand that though these books are copyright freed, they come from the private collection of generous people who have taken the time to painstaking scan and edit and digitize these books. The aim of The Antique Pattern Library is to make these books freely available so the wonderful art of needlework does not die.
What I am trying to say here is don't be crude enough to download and sell these on e-bay etc or pass them off as your own designs. It has happened before and will happen again... just let it not be you who is doing it.

Here are a few designs from the book - to help you decide if or not you want to download it.


As you can see, the designs are simple but the stitches employed gives them an exotic look.

What you will find:
1. A description of all the stitches used with diagrams.
2. 15 colour plates
3. The designs for tracing

The design on the left is my favourite - I just can't stop appreciating how the simple can also be exotic


Tuesday, January 11, 2011

Ideas for Designs

This wonderful blog, Print And Pattern as the name implies is full of wall paper prints and designs on coffee mugs.

The designs I've posted below are just a 10th of what was posted in Dec!

Do pop over and treat your eyes to a well deserved feast!

Most of the designs  in Print and Pattern would lend themselves well to Embroidery, Applique, Patchwork and Painting.

Here are a few of my favourites -

 - a beautiful design that can be used for applique on a cushion. The colour combination too is pleasing.


The 2nd picture too screams Applique but Embroidery too would work.
- very interesting combination of - should I call them textures?

I am a big fan of the monochromatic color scheme.

It would be interesting trying to reproduce this.

- the closed eyes and the upward tilt of the neck lend an endearingly haughty , lofty expression to the birds in the next 3 pictures.

Embellished with typical ethnic stitches, they'd make an interesting series.

Hmm... let me see... maybe on my sofa cushions.

One more project on my steadily growing to do pile...


- cute adorable owls  on baby clothes?
painted appliqued or embroidered?

If you liked this post, Print and Pattern is the spot to be.

Tuesday, June 15, 2010

Silk Ribbon Embroidery

This is what has become of the denim in the previous post. The flowers on the left are worked entirely in lazy daisy and straight stitch. The bunch on the right is composed of spider web roses, lazy daisy rose buds and very clumsy stem stitches and a scattering of beads.

There is this wonderful tutorial for all silk ribbon embroidery (SRE) stitches here. I discovered this really good blog through Sharon's PIN TANGLE

Click on pictures to enlarge


While working on this, I discovered some interesting facts about myself.
  • When I find something new and interesting, I am like a bull in a china shop.
  • Apparently, my patience quotient is  next to zero - and it shows in my work.
  • Its ok to do something slowly and not okay to do something imperfectly just because I want to finish it fast.
  • You can't not have the time to do something properly the first time round but have the time to do it again. Huh! Come again? Think about it.
I am determined that this is not going to be another one of my incomplete projects.

Here are the things I should have thought about before I started the SRE
  1. The needles - though my pony no.7 needles have a big enough eye, I could not thread the ribbons. I ended up using a tapestry needle which of course is very blunt  and thick and  not suitable. I got away with it since the fabric I used was denim. I am now hunting for a suitable needle.
  2. I should have checked for the suitability of the ribbons for specific stitches - I didn't and hence the shabby stem stitches in  the 2nd pic - bull in china shop.
I am now considering tatting patterns to embellish top edges.

Thursday, November 05, 2009

Beautiful Embroidery Books

Back again after a long break. Have signed up for oil painting classes. so I haven't had time for needlework. I am now halfway through the course and hoping to find some time here and there for needle and thread.

Speaking of needle and thread, here is a lovely book I've unearthed while digging through the archives of Project gutenberg -

Thursday, September 10, 2009

Woven Picot Flowers

I learnt to work this stitch from sharon's blog, you will find the instructions in her new blog - Pin Tangle

Click on pictures to enlarge.As you can see, I have worked the flowers in woven picot stitch. I tried to work buds in plain woven stitch, but it did not have a rounded tip. So, I worked a lazy daisy stitch and wove through the legs of the chain - you can see the finish in the picture below.

The petals of the flowers could have been spaced more evenly.

I realise in hindsight that I should have spaced out the petals before I started working. The sketch below will not win any awards for neatness, but, I am sure you get the idea.
I worked the five short lines first and then the longer ones in between.


Monday, January 08, 2007

TAST # 1 - The Herringbone Stitch - II

Here is my next installment of Herring Bone Stitches.

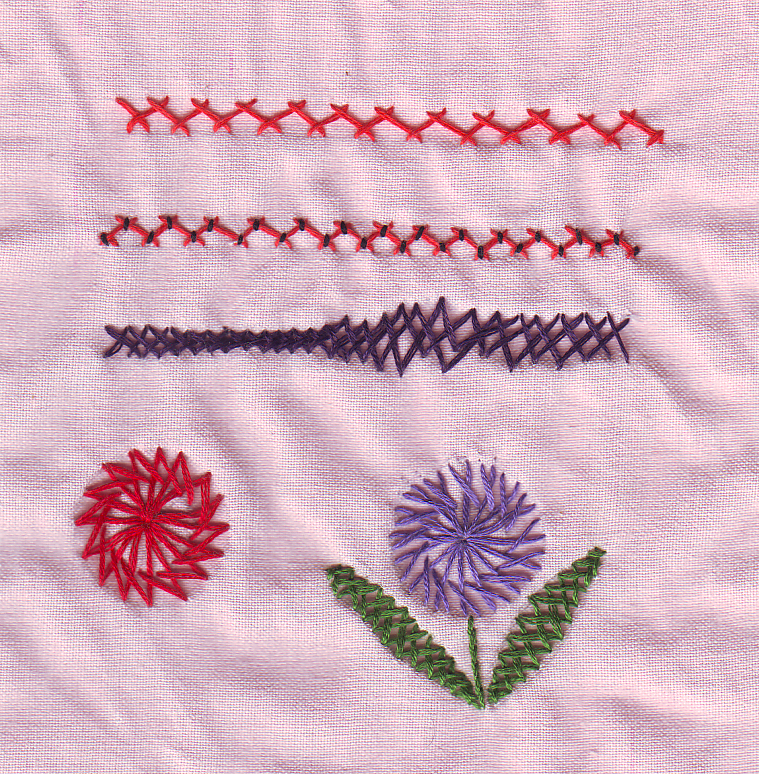
As you can see, I have not worked the stitches in any particular order.

1. The first one is the Double Herring Bone Method-I. Here one row of Herring Bone stitches is simply superimposed over a previously worked row.
I feel the stitch looks more complete if it is started and finished as shown in this sampler.

2.The second one is the Basic Herring Bone stitch laced with a contrast thread.


Click on picture to Enlarge.

3. I've always wondered if the Cretan stitch is a kind of Herring Bone Stitch. It certainly looks like one.

4. The stacked Herring Bone Stitch - nothing special there but for the effect.

5. The Double Herring Bone Stitch - Method-II. The difference between this and Method-I is the second set of Herring bone Stitches is interwoven with the previous one.

6. I loved the 4 rows of closely spaced H.B.S in Sharon's sampler and wanted to try it out. However having just worked the interwoven Double H.B, I got side-tracked. After a few initial glitches, this stitch was fun to do.
I used three strands of stranded cotten for working the 1st and 3rd rows and 6 strands for working the 2nd and fourth rows. It has a lacy effect.

7. Four rows of H.B stitches superimposed as in Sharon's sampler.

8. I used 6 strands of metallic thread to couch this ribbon. In the process I learnt a valuable lesson. Trying to pull 6 strands of metallic thread through closely woven fabric damages both the fabric and the thread.

9. The basic H.B done with silk ribbon.

10. The Double H.B-M-II is the foundation for this interlacing stitch. This stitch is frequently used in Kutch work - an Ethnic Indian Embroidery and also in Armenian Embroidery.

There are a few more variations I'd like to try out. If time permits, I'll do it today. Otherwise, I'll post pictures as soon as i complete it.

Sunday, January 07, 2007

TAST # 1 - The Herringbone Stitch

More than month since my last post - and what a month! Had our sofa upholstered. But the guys refused to polish the sofa. So I decided to sand and polish it myself. No point in having a new look sofa and clutter everywhere else so I started decluttering first one room and then the entire house including the loft. Criteria for throwing things out - if I haven't used something in more than 5 years, then chances are I am not likely to use it ever - so out it went. I still have two more shelves to declutter.

SharonB of inaminuteago.com has started a new challenge Take a Stitch Tuesday
She will dicuss a differnt stitch and all its variations each week. The stich discussed last week was the Herring bone stitch.

I have worked out the basic Herring Bone and a couple of variations.
My favourite though is the Herring bone Stitch worked within a circle. I struggled a bit with this. I remember my grandmother used to work this on hanky corners when I was a kid. I never bothered to learn the stitch and now she is no more. All I remember is that she used two coins to draw the circles. I am still not sure if I got it right. I have to check with my mom and aunts for samples of my grandma's work.
Thanks to Sharon, I was forced to try it out.

I have used the Closed Herringbone stitch for the first circle and the Open Herring Bone for the second.


I am still working on the other variations which I will post as soon as they are complete.

I am working on more variations,

Wednesday, September 06, 2006

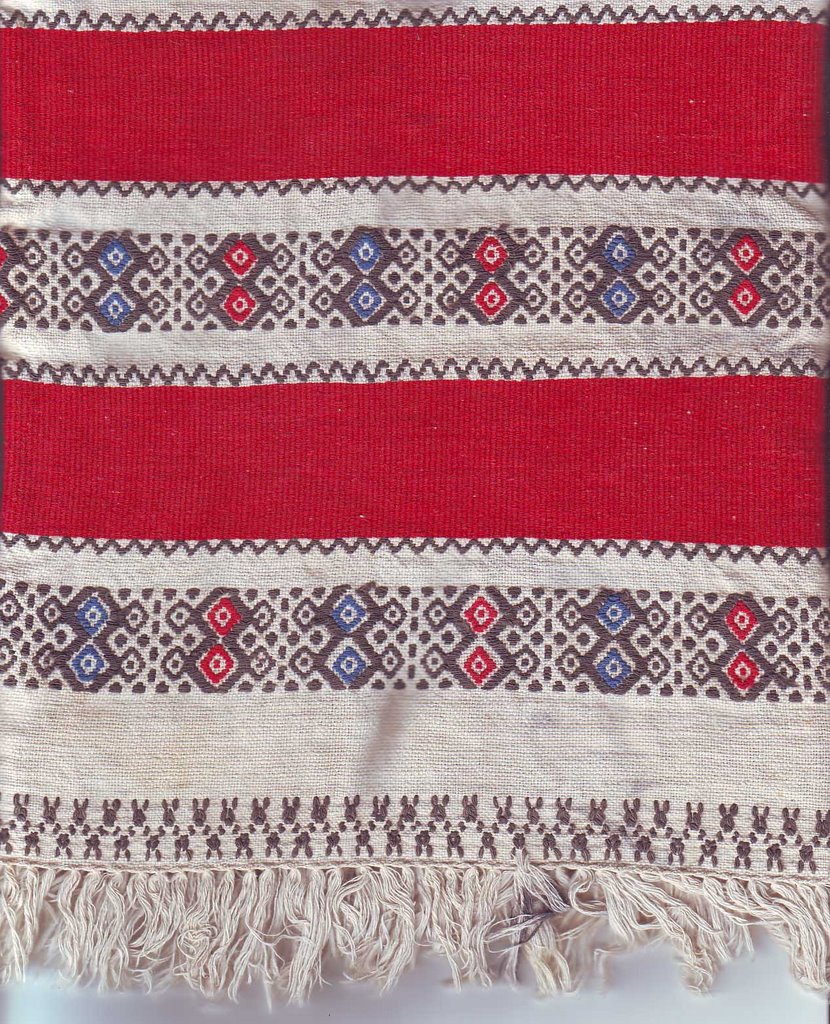
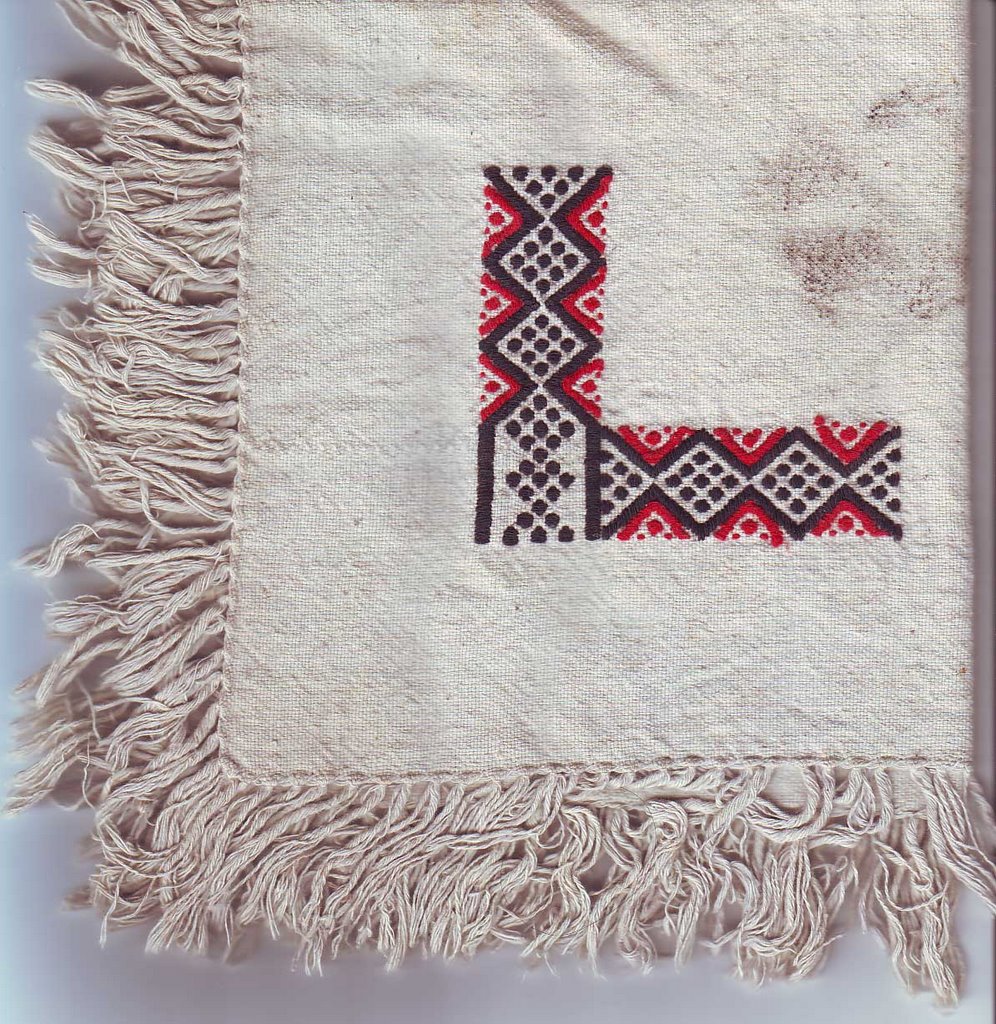
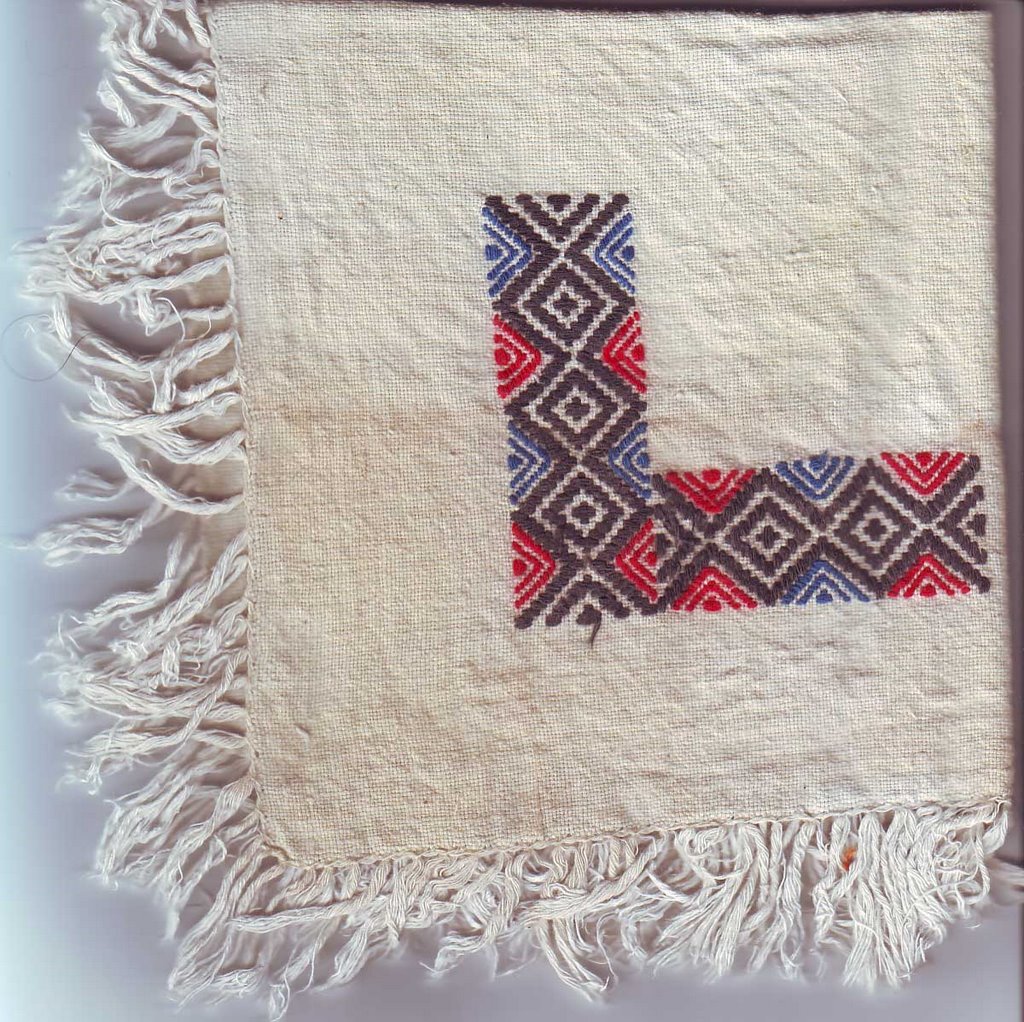
Toda Embroidery

For the past 7 years I've been wondering about this kind of Embroidery. I had only read about it. I searched the net but all I came up with is that Toda Embroidery is a type of embroidery done by the Toda tribe living in the Niligiri Hills OOty.
Then a few days back a student of mine showed me a piece of cloth that looked like the Hebrew Cloth(???) in the movies "The 10 Commandments". Guess what? She told me it was Toda embroidery and a very old piece at that - almost 40 years old. I have often heard the maxim, if you want something badly enough you'll get it - but this is the first time I am experiencing it.
Here is the piece I am so exited about.

Yesterday, she brought me 3 more pieces and here are the pictures.


The work looks a bit crude in the sense that the motifs are not properly aligned.

My next job is to chart these patterns and find out more about the history of this style of embroidery - after I complete charting the Lagartera Embroidery motifs, I am currently working on.

Friday, July 28, 2006

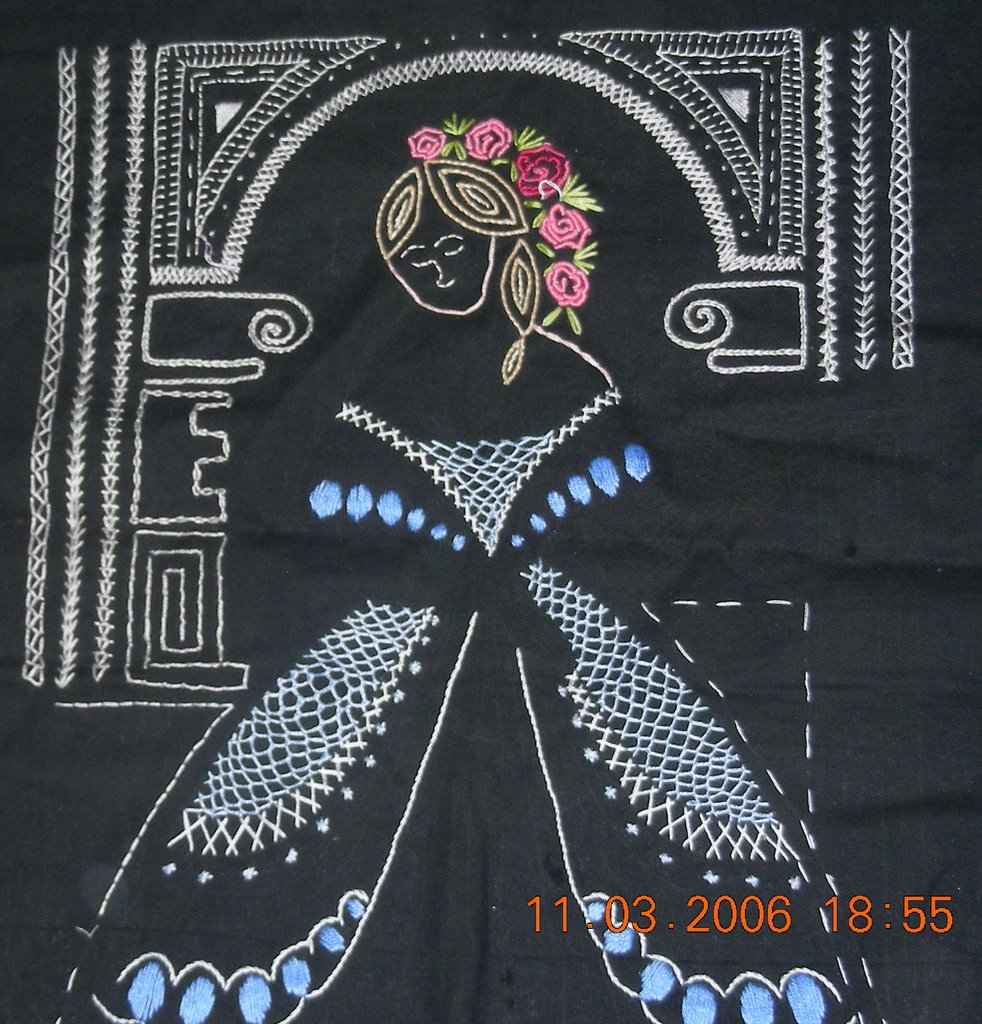
Lady in Embroidery

As I already mentioned in my previous post, I have quite a few incomplete projects.
I think I'll follow most of you and list them so I can tick them off my list as and when I complete them. There are projects from nearly 2 years ago.

1. I started this sampler wanting to use atleast 100 embroidery stitches. It is 3/4th done. This is the oldest project.

2. I started a pineapple crochet doily last year, and I stopped at round 11. It has 34 rounds. I picked it up again a week ago and I put it down at round 30 last night.
Hope to complete it during the middle of next week.
3. The basic crochet lessons I started updating is still in its rough draft stage.
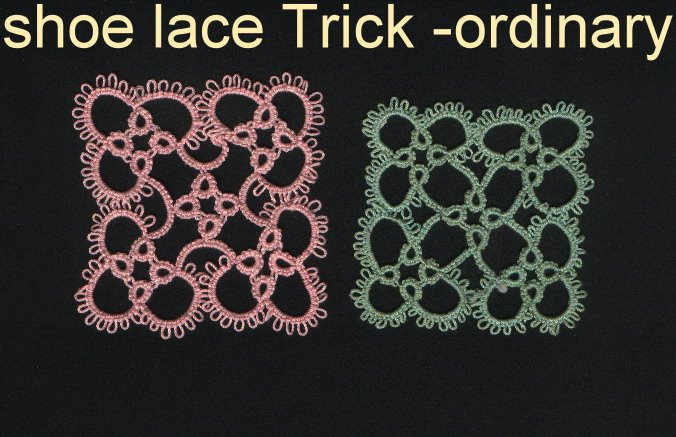
4.Same goes for the Basic tatting lessons. I want to incorporate CTM, SLT, Knotless tatting etc without overwhelming a beginner. Below is square motif in blue, tatted the conventional way and the same motif in pink using the Shoe lace Trick.

5. I have plenty of embroidery designs that were passed on to me by my grandmother. Needless to say, the papers are either breaking or are falling apart. She has used tissue that silk sarees and footwear came in as tracing paper. God knows how old those papers are. I am darkening them and scanning them so I can store them on CD.
6. Same goes for some of the old DMC embroidery books I inherited from her.
7. Same goes for my collection of Kutchwork designs. But they are only 15 years old.
8. Then there are a couple of incomplete overambitious cross stitch projects I started on canvas. One measures 5' x 3' and the other 3'x 2'.
9. I have atleast 10 sew projects in various stages.
10. I am yet to draft the Lagartera project I posted earlier this month.
11. My Kasuti tutorial is incomplete.
12. My latest incomplete work is the 50 Borders in Lagartera embroidery and of course charting them.
13. My scanner is still not installed.

Saturday, April 29, 2006

Brazilian embroidery

This is my attempt at Brazilian style Embroidery.
The first time I came across this style JDR Brazilian Elegance about six months back, I was stunned.


The double cast on stitch I used for the flower in 2 shades of purple and a bead in the center turned out quite well. And naturally, I am pleased.
The cast on stitch in red is a bit irregular and shabby.
The bullion flower looks better than I expected.

I love the flower worked in Bullion tipped lazy daisy stitch.
The drizzle stitch flower in variegated purple looks better in the picture than it actually looks. I think its unruly behaviour takes a bit of getting used to.

As for the red flower in detached buttonhole stitch, I need to practice the stitch some more.
The pistil stitch in pink is barely visible.
The leaves, I worked in stacked stem with a few French knots scattered along the edge.
The tiny bead flower I tried out after seeing a design in JDR Brazilian elegance.

In the JDR Brazilian Elegance's teaching kits, the focus is on how to use the different stitches unique to this style.
The cast on stitch, the double cast on stitch and the drizzle stitch are clearly explained in Sharon’s stitch dictionary.
The bullion tipped daizy stitch, I picked up from a tutorial by Sunshine in JDR Brazilian elegance. You can join Brazilian embroidery tutorial 101 to get free instruction in your mail.

Tuesday, March 14, 2006

Jacobean Embroidery


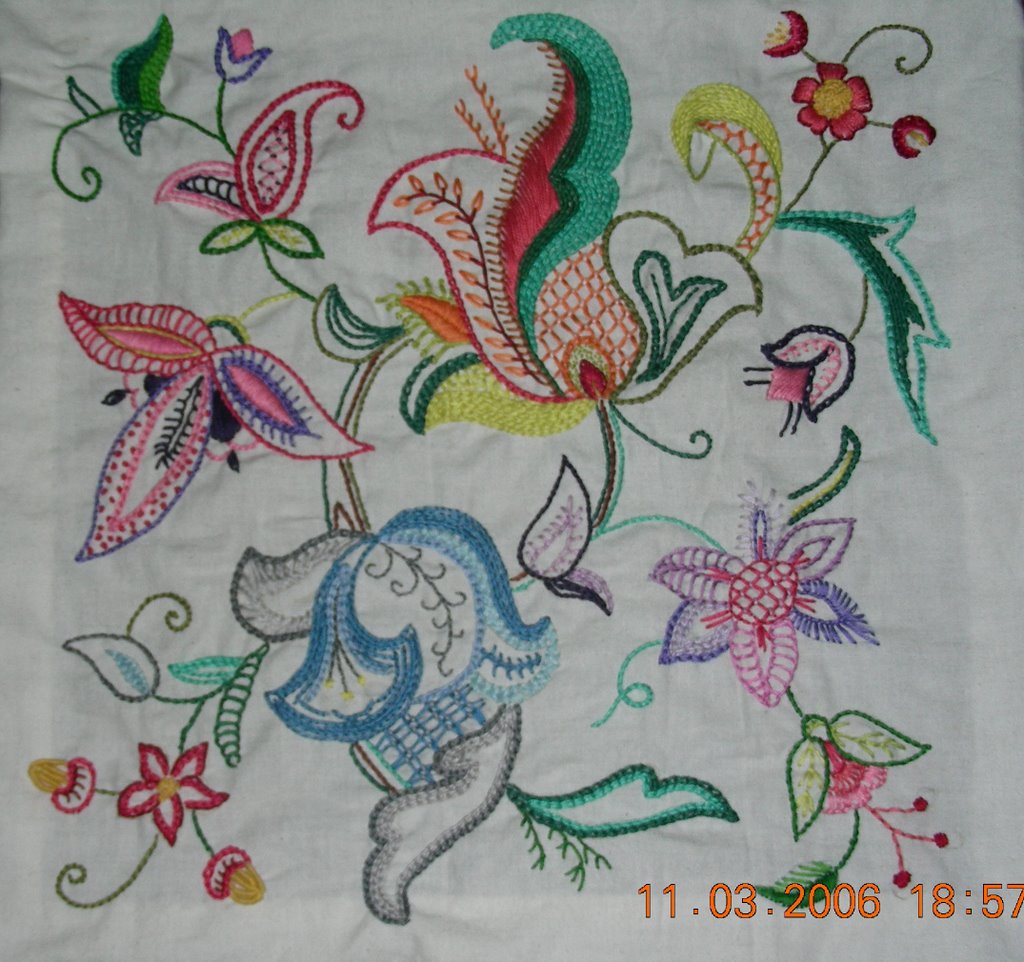
I am now working on a Jacobean embroidery sampler. I found a design sheet in my collection and started working on it. The colour combination is very dull. So I removed the stitches and started over with my own colours. I wonder if there are any rules to colours in Jacobean embroider
I discovered that colours used in Jacobean embroidery are mostly muted pastels. Check out the site www.accomplishments-shop.com/070303.htm.
This will give you and idea of what typical jacobean embroidery looks like and the colours snd stitches used. I'll post a picture of my Jacobean piece as soon as I get it photographed.

Meanwhile there are a host of interesting links I found educative and interesting.
Sharon B's blog inaminuteago.com is a real treasure house of information. needlecrafter.com has a stitch dictionary and a wonderful desisgn library. The stitch diagrams look exactly like those in Mary Thomas's Stitch dictionary.

A picture at last. I found this style of embroidery very convenient for learning about colour combinations. I've tried all three styles - monochromatic, analogous and complementry in this piece. Stitches used are jacobean couching, seeding, chain filling, open chain, stem stitch filling and outline stitch, satin stitch, french knots, straight stitch etc.